Friday, August 27, 2010

DIY drum smoker (or how I spent my summer vacation)


I recently went back home for a week and decided to do a little project with my father to keep busy.

I checked the internet and found a bunch of youtube videos on building a smoker out of an old drum barrel. This one had snorkels to vent air in http://www.youtube.com/watch?v=ejpbwAXdKf0&feature=fvsr. Awesome idea but a little out of our league.


This is our drum. It is an old juice drum.

The grill on top of it is a standard 22" grill. It didn't fit inside of the drum so we used a smaller one.


We had an extra cover off an old weber. We had to fashion a new handle for it.

Notice the thermometer under the handle on the leftside picture.


We were planning to use a 22" grill and bolts to hold the grill in place but the drum was too narrow for the grill. We ended up using a smaller grill and we used wire hangers to hang the grill from the top of the drum. (This would also make it easier to remove the grills while the smoking is being done.)


We drilled some holes at the bottom of the drum for venting. We wanted to use a valve for the venting so that we could control the airflow, but we were trying to keep it simple and cheap so we went with metal sliding pieces to control air.


Torching the drum inside and out.

For the fuel, we will use charcoal or wood. We got an old metal milk crate and put some mesh inside so that it is raised off the bottom. That way air can get through the bottom of the charcoal/wood and it shouldn't smother so quickly. The crate + charcoal/wood goes to the bottom of the drum.


This picture shows the two grills we used and the wire hangers we used to keep the grills in place. The bottom grill will hold our wood chips and drip pan.


The finished product. No paint or anything yet. My dad smoked some chicken inside of it and it tasted good.
This was a good and simple project. You would need some tools. But for the most part, anyone with a drum could do it. I would suggest cleaning it really well. Add some paint to this and it would make a nice, cheap, easy to use smoker.

If we had more time, a door would come in handy but since we decided to go with the wire hangers for everything, the door would be more of a luxury rather than a necessity. About half way through the smoking of the chicken, we did add more wood chips and the hangers made removing the grills easier.

Wednesday, June 2, 2010

How I got my alltrac running again (and didn't have to change my waterpump)


I am the proud owner of a 1988 Toyota Celica Alltrac.

A couple of months ago, it started smoking near the fanbelt and wouldn't want to idle. In fact, I was stranded at a Zippys restaurant one night and had to get a tow back home.

I immediately thought it was a seized waterpump as I assumed it was the most common point of failure near the fanbelt. I priced around for a pump but I couldn't afford a new pump at the time.

Well last week I decided that I had to get it running again. I was going to take off the waterpump and decide if there were other parts that needed changing while I was that deep into the motor. I had guessed it would be close to 6 or 700 dollars to replace everything. I was going to bring all of the parts to my nearby Checker autoparts store and verify that all the parts I was buying were similar to the parts I was removing.

I own 3 Toyota Celica repair manuals. None of them specifically for the Alltrac. I also took advice from the guide found here - http://mr2.com/ARTICLE/TimingBeltSW20.html. It is very detailed and it helped me alot.

One very good point of advice (which I did not follow) in the above guide was to remove the crank pulley bolt before even attempting to do any work. I have an impact gun so I was not worried. I had removed the inner fender lining anyway because I expected to eventually remove the pulley.

The pic on the right has my
breaker bar on the pulley bolt (19mm I believe).


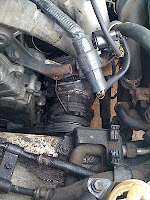
The picture to the left shows the various parts that I removed. I removed the radiator reservoir tank, exhaust heat shield, alternator, engine hook, and the a/c compressor.


This picture shows the alternator area with the radiator reservoir removed. I learned the hard way that cars with tensioners for their fanbelts have a loosening screw.

Notice the rusted looking pulley type tensioner below the fanbelt. There is a bolt that needs to be loosened on it before you can crank the tensioner bolt. The tensioner bolt is to the right of the pulley and it is turned clockwise to loosen the fanbelt.


The picture to the right shows the motor with the alternator, lower radiator hose, and exhaust heat shields removed. You need to remove a lot of parts just to get to other parts on this car.


The picture above shows the water to air intercooler. To get to the sparkplugs, you need to remove the intercooler. To check TDC, it is suggested that you remove the plugs so that turning the motor is easier. For this side of the motor, I removed the air intake and piping, the intercooler, blow off valve, and the intercooler overflow.

On the timing belt side of the motor you see one of the motor mounts for the 3sgte. Yeah, the clearance is that fricken close. At this point, I looked at the mount, scratched my head, looked at it again, and tried looking for another way to swap the waterpump.


I decided that I would remove the A/C compressor to try and see if I could get to the motor mount from the right side of the motor. That's when I noticed that the pulley was totally frozen. I made some calls and my suspicion was confirmed. The pulley should freespin. I had found my problem.

I had to remove the engine hook and the bolts holding the compressor to the block. I "borrowed" a compressor from another celica. It didn't quite fit but it was a good temporary fix.


I got the motor back together and took the car for a test drive. The car felt really good. The compressor must have been dragging for a while because it felt like I had more power than before the car broke.

I would consider this project a "success" as I got the car running again. I did not get to the waterpump so the original intent was not completed but the waterpump wasn't the problem anyway. All I know is that if that waterpump goes, it will be a real pain to get to. That motor mount is scary looking to remove.

Tuesday, May 4, 2010

Tortilla dessert

Last week my girlfriend wanted to make spinach rolls. I thought it would be fun (and funny) if I made a similar looking dish that was for dessert. Basically, it should look like a spinach roll, but should taste like an ice cream dessert.

Things I used:
Tortilla rolls
Butter
Honey
Sugar
Vanilla Ice Cream
Mint Ice Cream
Cherries

The first thing I was worried about for this project was the taste of the tortilla with ice cream. I was worried that the starchy, floury (is that a word) feel of the tortilla would not fit well with the ice cream.

I tried to fix that by giving the tortilla some taste. I drizzled it with honey.


After the honey, I thought it would still need a little more. I added butter and a little sugar and I zapped it in the microwave for about 20 seconds.


I put a layer of ice cream on the tortilla. It was kind of soft so it was hard to work with. I threw it back in the freezer to set up.

Next, I chopped up some cherries and put them on the ice cream. This would simulate the bacon bits that are in the spinach rolls. The ice cream started to melt again so I placed it in the freezer again.


The next thing I did was add mint ice cream. This was supposed to give the green color to the roll that would look like spinach. It was waaaay to light colored. I placed it back in the freezer for a few more minutes again.

Finally, I rolled it up and freezed it for a little longer. I took it out after about an hour and I cut it up to look like spinach rolls. As you can see, it looks more like egg sushi than spinach.
The taste was pretty good with this dish. The tortilla was a non-issue in regards to a weird texture or taste. It actually complemented well. It would be a good hot dish if you wanted to try it that way. You could blast it in the oven before serving for a few seconds.

The look was good enough to fool my nephew though. He refused to eat it. I even told him it was ice cream and he didn't want any. I guess that made it partially a success as I was hoping to trick him into thinking it was spinach.

All in all, I would consider this project a semi-success. The taste was pretty good but the look bombed. I would probably use green colored coconut shreds next time.

Sunday, April 4, 2010

Cinnamon Rolls in the crockpot (slowcooker)


So I read online that you can do desserts and even bake bread in the crockpot. I figured I would try something similar. I did not want to knead dough or anything, so I got a tube of pre-made grocery store cinnamon rolls and crock potted that.

I got some Pam and sprayed the ceramic pot and put the cinnamon rolls inside of it.

The instructions said that it normally takes a 350 degree oven about 30 minutes to bake. Since this was a crockpot, the high setting would probably hover around the 300 degrees mark. I figure it would probably take a little longer than 30 minutes. In addition, the rolls were put into a cold crockpot, so I compensated for that as well. I put it on high and put the timer on for 1 hour.


This is what they looked like after about 45 minutes of cooking.


After about an hour, they still seemed undercooked so I put it in for another 30 minutes.


After the 1.5 hours mark, I wanted to dry out the rolls. There was condensation on the top of the lid so I wiped it down, cracked open the lid slightly and let it sit on warm for another 10-15 minutes.


The finished product. It was actually overdone a little but I would consider this project pretty successful as I had my doubts at about the 45 minute mark.

Friday, April 2, 2010

Macbook superdrive removal

I recently have been having problems with my macbook's superdrive. It was making weird noises and at times, discs would not eject. Well today, it really flaked on me. It did not want to eject a CD I had just burned and everything I tried would not work. I tried several things I had read online about using credit cards, using CLI commands, holding down the mouse button during boot, reseting the PRAM... Nothing worked. There was very little sound coming from the drive and when I tried doing the credit card "trick" there was something blocking the card so I assumed that something was broken on the drive.

The computer is out of warranty. It was one of the 1st generation black macbooks. I decided to take it apart to remove the CD.

First thing I did was look online for information on removing the superdrive. There is A LOT of information. The guide I followed was from http://fastmac.com/downloads/macbook_superdrive.pdf. It is really informative and I basically did everything exactly as the guide. I am posting this as another guide that hopefully will help you see things from different camera views. (Although my pictures came out really blurry)


First thing is first. Remove the battery, unplug the computer and make sure you don't hold a static charge. This is covered on the guide that I linked above.


Remove the L-bracket by loosening the screws and pulling the bracket carefully out.


Remove all of the external case screws. Make sure you remember which screws came from which parts of the case as they vary in size.
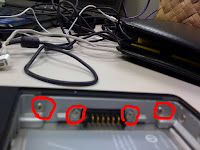
Next remove the screws indicated by the red circles in the following pictures.


To remove the top case, use a card of some sort that is stiff enough to wedge into the side of the case. Carefully work your way around the case until top (keyboard/trackpad) case comes off. Be careful and watch for any snags or anything. If anything feels tight, you may need to double check if you missed any screws.


There will be a cable from the top case that is attached to the macbook's system board. Remove it with a flathead screwdriver.


Next move the bluetooth unit and move it away from the superdrive.


Remove the harddrive and screws holding the superdrive in place.


Remove the cable connecting the drive to the macbook's system board. Remove the EMI shield near the macbook's fan as well.


There is a cable that runs above the drive. Move the cable on the side so the drive can be removed.


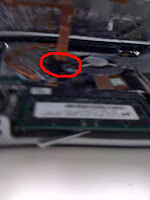
Near the fan, next to the superdrive, under where the EMI sheild was, there is a screw. It might be under some cables. Move the cables aside and remove the screw. The screw holds a bracket that needs to be slid towards the direction of the fan. You can use a flathead screwdriver to do that job.


You should be able to lift the drive out of the macbook now. If it does not want to cooperate, make sure you removed all of the screws and there aren't any cables blocking the drive.


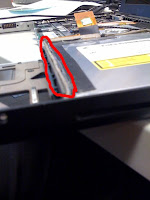
This is a picture of the bracket that you needed to slide out to remove the drive in the step above.


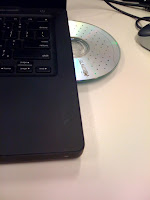
I was able to remove the CD that was stuck by moving this arm. That is what I was feeling when I was trying the credit card "trick." It seemed warped or something on my drive.


After removing the CD, I put everything back in the reverse order that I put it in. I tested the drive and it worked.... For now...

I will admit that this is one of the easiest laptops I have worked on. I don't have extensive experience in working with laptops, but with my limited knowledge and lack of tools, I was still able to get to the drive.

Friday, March 5, 2010

Datsun 510 - doors

My ongoing project - my 1970 Datsun 510. It is a 4 door. I couldn't find a 2 door when I was bought this one, and now that I have it, I don't want to part with it.

Today, I finally finished one of the doors on my car. It has been sitting for a couple of years now and my goal for this year is to get it running enough so that I can send it home to my brother.

When I originally planned to do this project, I was torn between just cleaning up the interior and keeping it as stock as possible, or to redo everything and make it just look better with paint and stuff. I decided that it would be much cheaper and easier if I just redid everything instead of trying to get the car to "showroom stock" look.


First thing I did was remove all of the accessory parts. If any of you don't know, there are c-clips that hold alot of the parts on doors like the window crank, door handle, etc. You can buy one of those c-clip removal tool or you can use a cloth to "pop" the c-clip out. If you want to try that, just get a fairly thin piece of cloth like a shirt, slide it under the accessory like the window crank and wiggle it around until you feel it get caught on the c-clip. Keep wiggling and pulling on the cloth until the part comes off.

I carefully removed all of the parts. The really hard part was removing the vinyl backing that goes on the door. It is held on by clips that are attached to the backing of the vinyl. It is easy to break those clips as some people with newer cars will attest to. Imagine trying to do that when the car is around 40 years old!! I know there is a tool for that, but I didn't have one handy, so I just had to be really careful.

I bought some vinyl spray paint, white primer, black paint, and white paint. I sprayed all of the accessory parts with black paint, sprayed the doorskin with the vinyl paint, and sprayed the inner door with primer and white paint.

After everything was dried, I replaced all of the parts.


Notice how the redid parts look compared to the old door. I am still kind of torn about the stock vs. modified look but since I am poor, a clean looking interior will have to do over a bone stock restored interior.